How to Tie a Perfect Windsor Knot in 9 Steps
How to Tie a Windsor Knot – Step-by-Step
Welcome my stylish friends! Are you tired of your neckties looking lacklustre and uninspiring? Fear not, for we are here to elevate your style game with the magnificent Double Windsor knot. In this step-by-step guide, we will unravel the secrets to achieving a perfectly symmetrical and sophisticated knot. So grab your favourite tie and let’s dive into the art of tying a Double Windsor knot!
Incidentally the Windsor Knot is also known as the Full Windsor or the Double Windsor knot. These are all just different names for the same thing.
Step 1: Start with the Wide End
Begin by draping the tie around your neck, with the wide end on your right side and the narrow end on your left side. Ensure that the wide end hangs down roughly to thigh level. The Double Windsor knot requires a surprising amount of tie.
Top Tip: Make a visual note of where the wide end comes down to as this will be the same every time you tie your tie, whichever tie you wear and however long it is – the wide end is key.
Step 2: Cross the Wide End Over
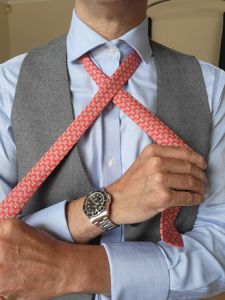 Take the wide end of the tie and cross it over the narrow end, forming an X-shaped loop just below your chin. The wide end should now be on your left side.
Step 3: Bring the Wide End Up and Through
 Take the wide end of the tie and bring it up through the loop created in Step 2. Hold the wide end with your left hand, keeping the loop intact.
Step 4: Cross the Wide End Behind
Now, cross the wide end of the tie behind the narrow end, from left to right. The wide end should be on your right side now.
Step 5: Bring the Wide End Up and Through Again
Bring the wide end of the tie up through the loop once more. This time, pass it from the front to the back. Keep the loop loose, as you will need space to complete the knot.
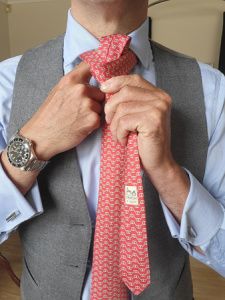
Step 6: Thread the Wide End Through the Front Loop
 Take the wide end of the tie and thread it down through the front loop you created in Step 5. Hold the narrow end with your right hand to keep the knot secure.
Step 7: Pull the Wide End Through the Back Loop
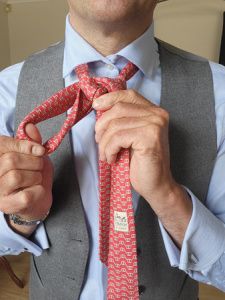 Now, pass the wide end of the tie through the back loop. To do this, bring the wide end over the front of the knot, from right to left, and then thread it down through the back loop.
Step 8: Tighten the Knot and Adjust
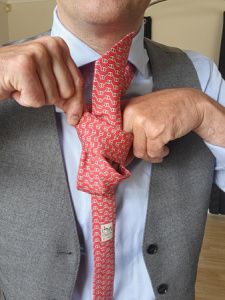 Gently pull the wide end downwards to tighten the knot. Slide the knot up towards your collar, adjusting its position to achieve the desired length and symmetry.
Step 9: Straighten and Finishing Touches
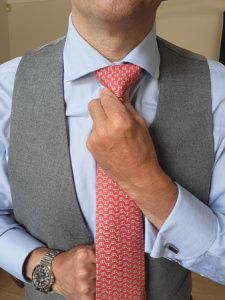 Straighten the tie by holding the knot with one hand and pulling the narrow end with the other. Ensure the tie lays flat and evenly across your chest. Tuck the narrow end into your shirt, securing it neatly.
Optional Style Tips
Now that you’ve mastered the Double Windsor knot, here are a few optional tips to elevate your tie game even further:
- Choose the right tie length: Ensure that the wide end of the tie falls just above your belt buckle, creating a balanced and polished look.
- Experiment with different fabrics and patterns: Play with textures, colours, and patterns to add personality and flair to your outfits.
- Pair with a well-fitted shirt and suit: The Double Windsor knot pairs exceptionally well with spread collar shirts and suits with wide lapels, exuding a sense of confidence and sartorial excellence.
And there you have it! With this step-by-step guide and a little practice, you’ll be tying a Double Windsor knot effortlessly. Prepare to turn heads and impress with your impeccable sense of style, all while proudly representing Scotland’s fashion-forward sensibilities.
Happy knotting!